02
03
Pinewood Derby Stories and Photos from Maximum Velocity
04
05
15
16
19
20
21
22
23
24
25
26
27
28
31
32
33
34
Upgrading Needle Axles
By Randy Davis
For races that allow freedom in selecting wheels and axles, needle wheels and axles are a great choice for building a high-performance car. Cars equipped with needle axles will generally dominate over traditional axles.
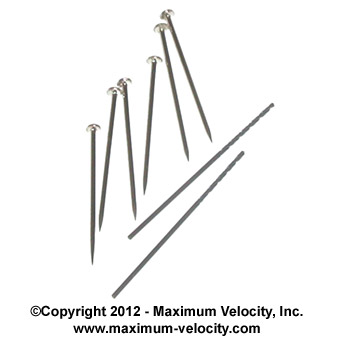
Figure 1 - Standard Needle Axles
However, needle axles can be tricky to implement. I have built cars with needle axles on a few occasions, and have discovered first hand how needle axles can be a bit frustrating to work with.(1) Drilling the tiny axle holes in the block of wood is a real challenge, and keeping the axles from bending under race conditions is also a bit of a headache.
THE UPGRADE KIT
But now these difficulties are no longer an issue. With the introduction of the Needle Axle Upgrade Kit, installing needle axles on a car is not much different than installing regular axles.
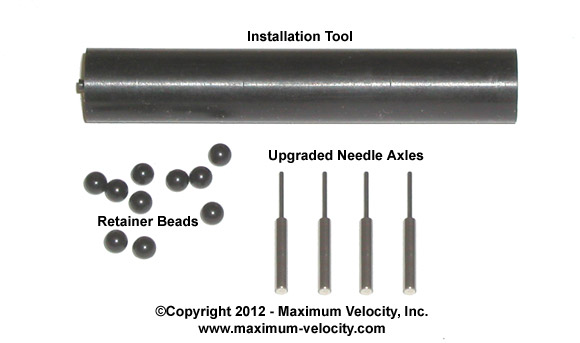
The Needle Axle Upgrade Kit consists of four upgraded axles, retainer beads, and an installation tool. The axles are sized to fit into standard axle holes (drilled with a #44 drill bit), or standard axle slots. The upgraded axles are made from a harder stainless steel than the standard needles, so they resist bending. The installation tool is used to press the axles into place, and to bend the axles if
desired.
Figure 2 - Needle Axle Upgrade Kit
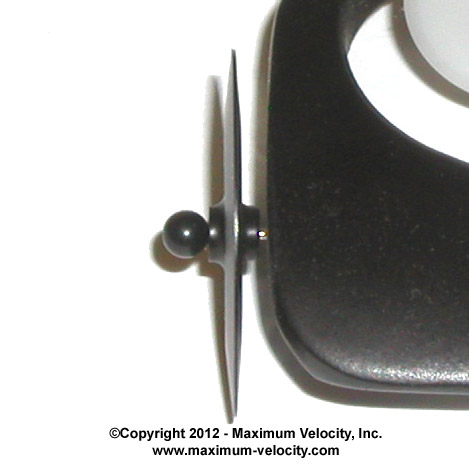
The retainer beads press fit onto the axles to hold the wheels in place. If desired, they can be removed with pliers for cleaning and re-lubing of the wheels and axles.
Figure 3 - Installed wheel and upgraded axle
IMPLEMENTATION
The preparation and installation procedure for the upgraded needle axles is not much different than that of traditional axles:
1. Polish the axles with Axle Polish (part 5101), or use the two finest papers in our Axle Polishing Kit (part 5100). If desired, Diamond Polish (part 5107) can be used for a final high shine.
2. Select four beads that fit tightly onto the axle shafts (extras are supplied). If you don't want black beads, then purchase beaded pins from a craft store. Remove the beads, and finish drilling the hole through the bead with a #66 drill bit.
3. Prepare the axle hole or slot by reaming with a #44 drill bit.
Do not install the axles until the car is complete. Axle shafts will be damaged if removed.
4. Press each axle into place using the installation tool.
5. Apply lube to an axle; we recommend Kryox 100 (part 5106).
6. Place a wheel onto the axle with the dish-side of the wheel facing the car body.
7. Press a bead onto the axle shaft. Use a gap gauge to set the distance between the car body and the wheel. No glue is required for the bead.
8. Repeat steps 5 to 7 for the other three wheels.
9. To remove the wheels, grasp the retaining bead with a pair of pliers, then twist and pull.
Note that the axles are for use with RSN and RSNX wheels. They cannot be used with the wider SSN wheels.
PERFORMANCE
Obviously, performance will vary from car to car. In a test I did between two similar cars, one with the upgraded needle axles and RSN wheels, and the other with standard axles and RS wheels, the needle axle car consistently beat the standard axle car by one car length. This performance advantage is consistent with what I have witnessed at competitions between needle, and non-needle axle cars.
CONCLUSION
Of course, needle axles cannot be used at many races, but if you have the opportunity to use them, don't hesitate. You will experience a big performance boost; and now with the Needle Axle Upgrade Kit, implementation is a breeze. Good luck!
(1) For an article on my previous experiences with needle axles, please Click Here.