02
03
Pinewood Derby Stories and Photos from Maximum Velocity
04
05
15
16
19
20
21
22
23
24
25
26
27
28
31
32
33
34
Car Build Progression
In talking with parents at our local workshops and across the country
I find that the order of building the car is quite misunderstood. In
many cases, people shape the car body before making any provision for
adding weight. In other cases, the body is built without axle slots or
holes, with the intent of adding them later.
While these unorthodox methods of building a car can sometimes yield
good results, more often the car building experience is frustrating.
Today's article will provide a proven car build progression, using the
Wedge SE(1) as an example. This particular design, which adds some
flair to the basic wedge design, can be easily built with basic hand
tools. But, regardless of the final shape of the final car, the basic
build progression still applies.
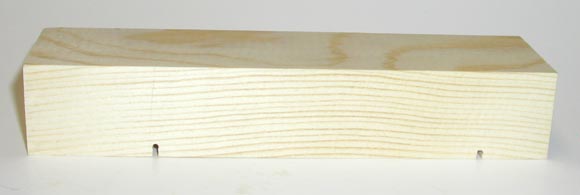
STEP 1 - Prepare axle slots
The first step is to examine and prepare the axle slots (or holes).
Check the slots to make sure that they are cut square to the block,
and if not replace the block. Then insert an axle (preferably a spare
axle) into each position, and remove it. This will open up the slots
so that when the wheels are installed, the axles will go in a little
easier.
A more accurate way to prepare the slots is with a Pro-Body Tool.(2)
This tool will prepare the slots and correct for slight slot
deviation. The tool will create a deeper slot if you want a raised
front wheel.
Slots Prepared with Pro-Body Tool
Left (front) Slot is Slightly Deeper
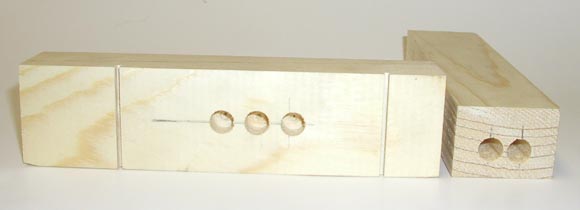
STEP 2 - Mark and drill for weight
Next, mark the block and drill the weight holes, or create weight
pockets. For the Wedge SE, two deep holes are drilled in the back of
the car, and three shallow holes under the car to accommodate lead
wire.(3)
Weight Holes
If you are not sure how much weight will be needed for your design, an
estimate can be made as follows:
1. Weigh the block.
2. Estimate the percentage of wood that will remain after the car body
is complete. For example for the Wedge SE, the percentage is about 40
percent.
3. Multiply the weight of the block times the percentage remaining.
4. Weigh the wheels and axles (stock BSA wheels and axles weight about
0.6 ounces).
5. From five ounces, subtract the block weight (from step 3) and the
wheel/axle weight (from step 4). This is the amount of weight that
will be required to bring the finished car to five ounces.
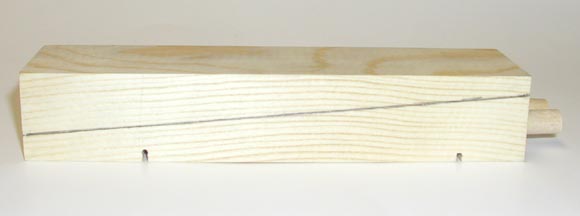
STEP 3 - Rough Shaping
Next, weight is inserted into the back holes, the holes are plugged,
and the block is marked for the main wedge cut.
Wedge Cut Marked on Block
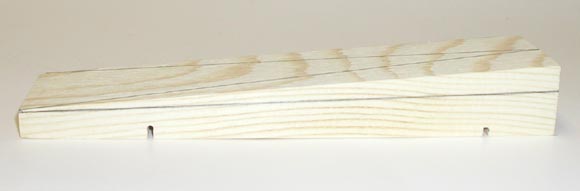
After the glue dries, the excess plug is cut off, the main cut is
made, and the top is sanded smooth. Next, the lines for the bevels
are marked on the block.
Main Cut and Bevel Lines
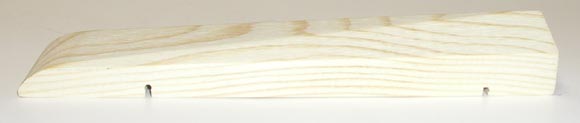
STEP 4 - Final shaping and sanding
The bevels are then cut and sanded smooth. The nose of the car is
then rounded with sandpaper. Finally, the entire car is sanded with
120 and 220 sandpaper.
Shaping and Sanding Complete
STEP 5 - Primer
You can prime the car at this point, but if you want a nicer finish,
a thin layer of body filler, such as Bondo, can be smoothed over the
car. When the filler dries, sand it smooth. Then prime the car with
two or more coats of a quality primer. Lightly sand with 600 grit
paper between coats.
Primer Coat
To simplify painting, try inserting a long screw into a weight hole in
the bottom of the car. This screw serves as a handle for holding the
car while painting, and also as allows the car to be attached to a
hook or line for drying (I use a binder clip on a piece of wire that
is strung between two legs of a workbench).
STEP 6 - Finish Coats
Next, apply the finish coats. I recommend Acrylic Lacquer paints, such
as Krylon. Avoid enamel paints, as they have a long dry time and tend
to stay tacky for several days.
To avoid runs, apply several thin coats instead of one thick coat.
Make sure to read the paint re-coat instructions. Some paint allow
recoating within one hour, or after 24 hours. What happens if you
recoat in between? Trust me, you don't want to know!
Finish Coats
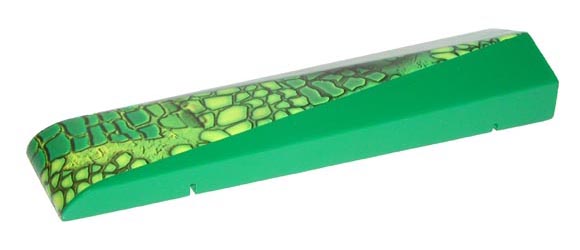
STEP 7 - Detailing
Detailing is a completely personal choice. Below are several
possibilities for completing this particular car.
Gator Body Skin
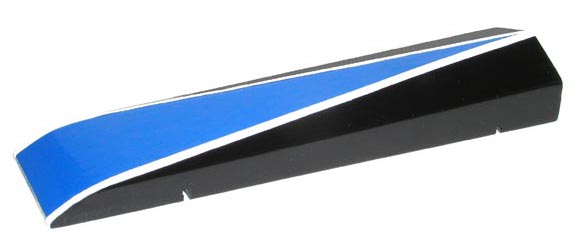
Two-tone Paint Job, White Pin-striping
For a two-tone paint job, paint the main color, and allow it to dry.
Then mask with painter's tape and paper, and apply the second color.
Pin-striping can then be applied to cover the area where the colors
converge.
Additional painting options can be seen at the following links:
CONCLUSION
Whether you build a simple wedge, or a complex design, I strongly
recommend using the build order described here. By ensuring that the
axle mounting system is established first, and the ballast weight is
accommodated next, you will be on your way to building a great
pinewood derby car.
(1) Complete plans for the Wedge SE are available in our Wedge Car Plans booklet.