02
03
Pinewood Derby Stories and Photos from Maximum Velocity
04
05
15
16
19
20
21
22
23
24
25
26
27
28
31
32
33
34
Scaling Up Part 2: Design a Pinewood Derby Car from a Toy Car
In the first part of this article ("Scaling Up: Design a Pinewood Derby Car from a Toy Car", Volume 6, Issue 12 - March 7, 2007), the various aspects and considerations of a scaling up from a toy car were considered. These considerations included scale factor, fenders, wheelbase, etc. If you haven't read this article, you can find it Here.
In today's article, we will go through the process of scaling up a toy car, including photos and comments on each step of the process. In general, this process can be adapted for any toy car.
CAR SELECTION
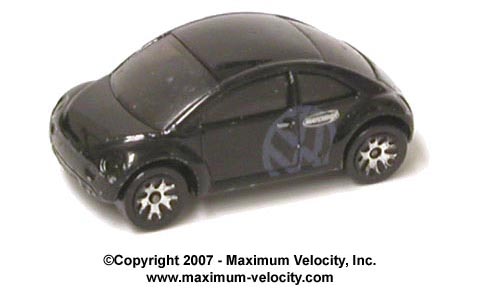
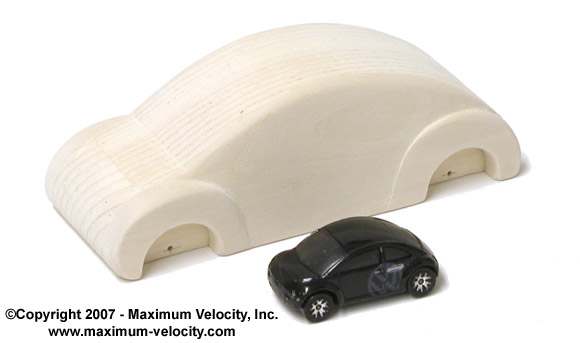
The first step is to select a car to build. In picking the car, certainly consider ease of building, as well as aesthetics. After scrounging through my son's collection of cars, I chose a recent model VW Beetle (see Figure 1). Ever since I drove a 'Bug' in high school, I have always thought it would be fun to own one; at least now I will have a pinewood derby version!
Figure 1 - VW Beetle Toy Car
Although the final result will not likely be a speed demon, it will be "cute", and will adequately demonstrate the scaling process. But more to the point, it is a design that I have confidence that I can build without pulling (the rest of) my hair out!
SCALE FACTOR, ETC.
To calculate the scale factor, first measure the length of the toy (2.46 inches) and divide this number into 7 inches, resulting in a factor of 2.85. Multiplying this factor by the height (0.85 inch) results in 2.4 inches. This is rather tall for a pinewood derby car, but will still meet the height limits and can be achieved by gluing two blocks together.
The width of the toy car measures 1.29 inches. Scaling this up results in a width of 3.26 inches. Obviously, this is too wide, so we will stick with the basic body width of 1.75 inches plus 0.375 inches of fender on each side (overall width of 2.5 inches). The resulting car will appear slightly narrow, but that's the breaks.
To maintain the look of the car, let's directly scale the wheelbase. This will result in a wheelbase that is longer than a standard BSA wheelbase, so the car might not be legal in all races. If desired, the wheelbase can be adjusted to match the BSA wheelbase (or any wheelbase), but for this exercise I prefer to keep the look of the car as close as possible to the model. Axle locations: Toy - 0.39 inch, Model - 1.1 inches from ends of the block
TEMPLATE
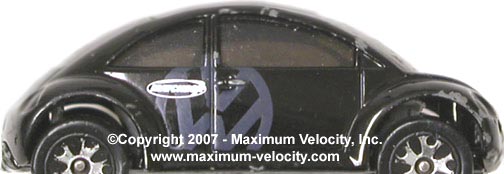
Now that we have crunched the numbers, I'll share a simple method to create a properly scaled template for the side of the car. First, take a digital photo of a side of the car. This photo must capture the side of the car as dead-on as possible; if the photo is skewed left, right, up, or down, the template will be skewed in a similar fashion. I recommend using a tripod, and then taking several photos at slightly different positions until you get a perfect side-on shot.
Next, bring the photo into a photo editing program. Crop the photo tight against the two ends and the bottom of the car. Then scale the photo to 7 inches long, allowing the height to adjust proportionally. Print out the photo onto a piece of card stock, cut out the outline, and voila, you have a perfect template (see Figure 2).
Figure 2 - Template of Side View
BUILDING
As mentioned, the model car will require two standard blocks glued together to achieve the height, and two 3/8 inch pieces of wood, glued on either side of the car to accommodate the fenders and achieve the overall width. With that much wood, the weight of the car will likely exceed 5 ounces. So, I picked two of the lightest blocks I could find. Still, much wood weight will need to be removed; I'll show you an easy
way to do this.
First, glue the two blocks together, aligning the sides and ends as closely as possible. Make sure to clamp the blocks firmly, and allow the glue to completely dry. Then sand the sides of the blocks flat, eliminating any 'bump' at the glue joint.
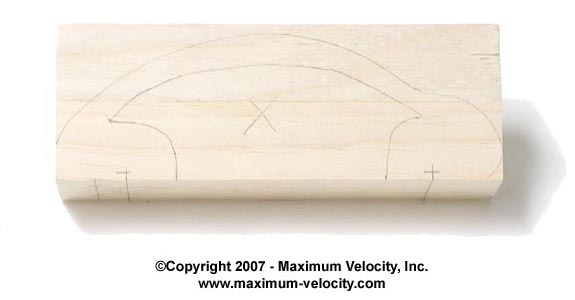
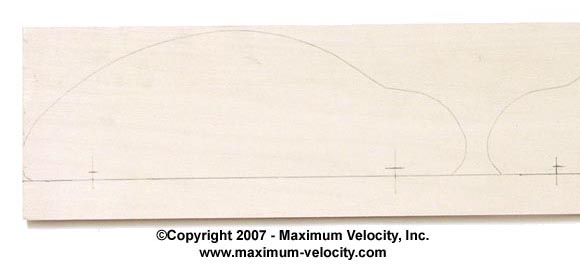
Next use the template to mark the axle drilling locations and trace the outline. The outline will not be used for cutting out the car, but will instead be used to help mark an area of the block for removing excess wood weight. In Figure 3, the area marked with the 'X' will be cut out. When marking this area, make sure to leave sufficient material to glue on the sides of the car, and leave the area around the fender wells intact. I also marked two spots on the bottom of the car for weight holes.
Figure 3 - Marked Block
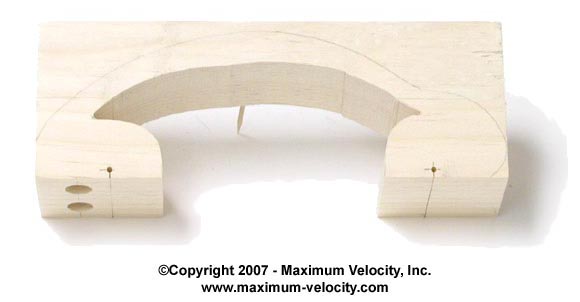
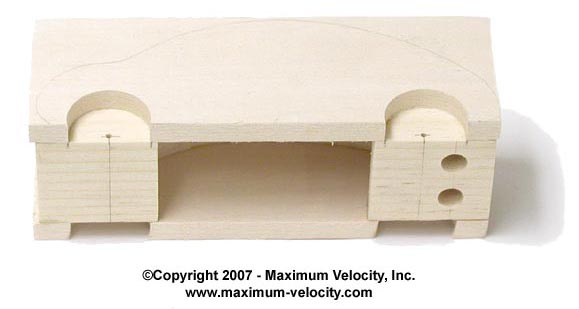
Now it is time for the first machining steps. Drill the axle holes (#44 bit for BSA axles, 3/32 inch bit for Awana axles). I drilled the axle holes 1/8 inch off the bottom of the block, all four wheels on the ground. Then drill the two weight holes with a 25/64 inch bit (or similar - to accommodate lead wire). Next, cut out the center area. Figure 4 shows the result of these steps.
Figure 4 - Machined Block
Now we shift to the side pieces. I recommend using Basswood. This wood is clean-grained, softer then pine (simplifies shaping), and is readily available in various shapes at most hobby or craft stores. I used a piece measuring 24 x 3 x 3/8 inches. Trace the template and mark the axle locations, then flip the template over and repeat (in other words, create a mirror image for the other side of the car). Make sure to leave material below the car outline to simplify creating the wheel wells
(see Figure 5).
Figure 5 - Marked Sides (right side of photo is cropped off)
Now we will use an appropriate-sized Forstner bit (the diameter is calculated from the toy).(1) Make sure to place the side piece on a scrap board as you drill, or the wood will "chip out" as the bit exits the wood. Then cut off the excess wood from the bottom of the side pieces (see Figure 6).
Figure 6 - Machined Sides
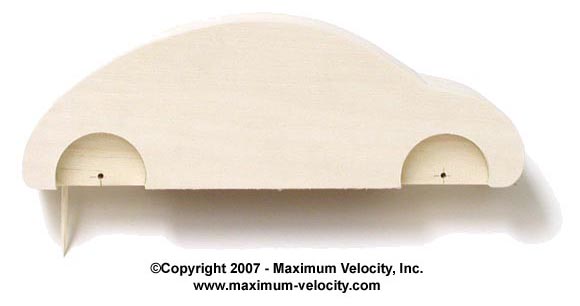
Now it is time to glue the side pieces onto the main body. I used two scrap BSA wheels and axles to make sure the fender wells lined up with the axle holes. Again clamp firmly, and allow the wood to dry before continuing (see Figure 7).
Figure 7 - Sides Glued to Body
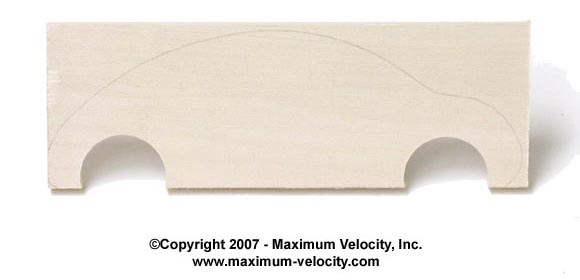
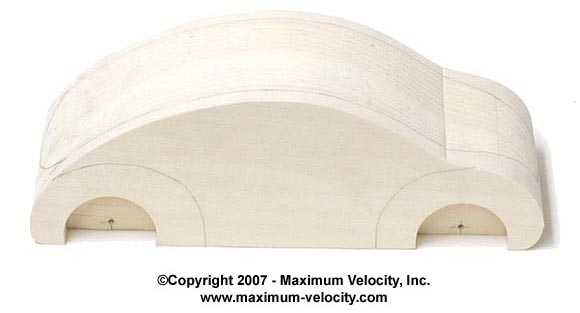
Okay, let's cut out the profile and sand it to a reasonable level of smoothness (this isn't the final sanding). Now we have the basic VW Beetle without any detail work.
Figure 8 - Cut and Sanded Body
At this point use the toy car to pencil in detail lines. I chose to highlight the fender wells and the sides of the car, but you can do more detailing if desired (see Figure 9).
Figure 9 - Detail Lines
Here is where my skill level starts to get weak. I know many of you are very adept with a Dremel-type tool. Unfortunately, I flunked Dremel 101, so I must stick with wood rasps and sandpaper for shaping. After an hour of work, I ended up with the body shown in Figure 10. The body, without wheels, axles, or weight comes in at 3.6 ounces.
Figure 10 - Shaped Body
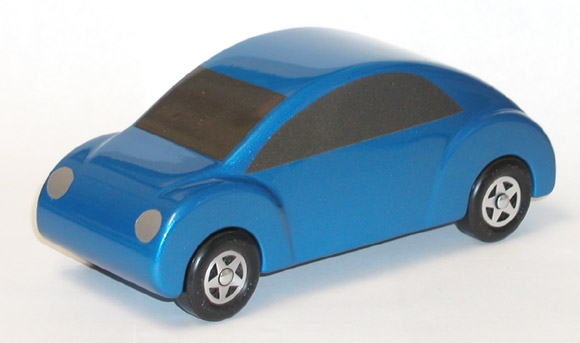
With a paint job provided by a talented local painter, and the addition of some window trim, the completed Beetle is shown in Figure 11.
Figure 11 - Completed Car
CONCLUSION
This was a fun project, which resulted in a nice show car. You can use the same techniques to make a show car or a competitive car. Just make sure to plan ahead and use the step by step process I have outlined. If you do scale up a toy car, please send a photo and description. I'll be glad to include it in a future edition of this newsletter.
(1) This is one mistake I made. I used a 1-1/4 inch bit, as I knew it would allow BSA wheels to fit. However, this bit was not large enough to accurately model the size of the wheel wells on the toy car. I should have used a 1-1/2 inch (or larger) bit.